Most times, the system manufacturer forces you to download the graphics drivers from their website and not Intel’s. This is because they want you only to use software that’s tested to work on the machine. To ensure this, they block the installation of the software got from Intel. If you attempt to install Intel’s version, you get the following error message: This is similar to the issue where your system says you already have a better driver than the one you’re about to install. However, the driver error wouldn’t have been an issue, but the problem is that manufacturers aren’t known for rolling out timely graphics driver updates. If all you can lay your hands on is the driver software from Intel, you can fix the error by installing it manually.
The driver being installed is not validated for this computer
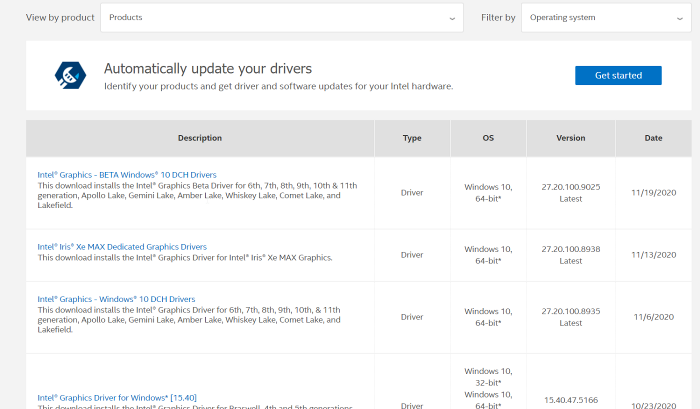
Follow the steps below to install the Intel graphics driver manually on your computer. Continue reading this guide for the full steps for updating your Intel graphics driver manually if your manufacturer is preventing you from doing it. Manual installation of device drivers is easy but not as straightforward as regular software installation. Luckily, you only need to do it once. After the first time, you would be able to install the graphics drivers the normal way. To install Graphics drivers manually, start by downloading the driver software from intel.com. The download is in a zip archive. So, you can extract the contents of the zip folder.
You can do that with a zip extraction and compression tool or by right-clicking on the zip and selecting the Extract all option from the context menu. Go to the folder you extracted it to and set File Explorer to display their file extensions. To do this, click on the View tab and mark the File name extensions checkbox. Next, press the Windows key + R combination and type devmgmt.msc, and hit ENTER. This opens the Device Manager.
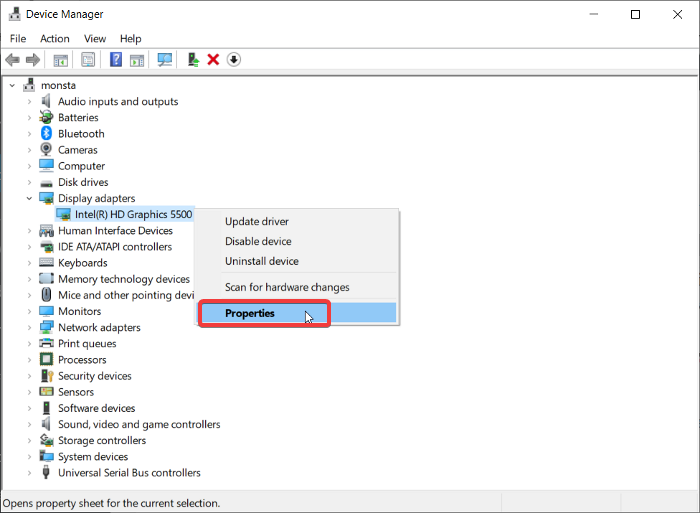
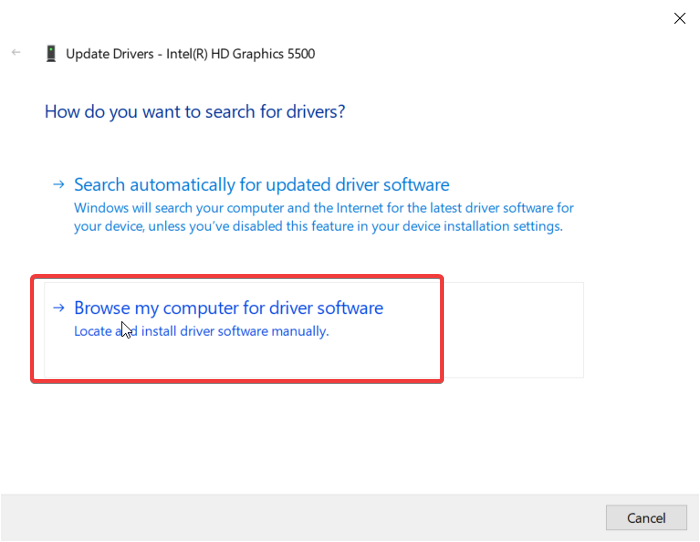
Expand the Display adapters section to reveal your Intel graphics card driver. Right-click on this driver and hit Properties from the context menu. Go to the Driver tab and click on the Update Driver button. Next, Windows will ask where you wish to update the driver from. Select the Browse my computer for driver software.
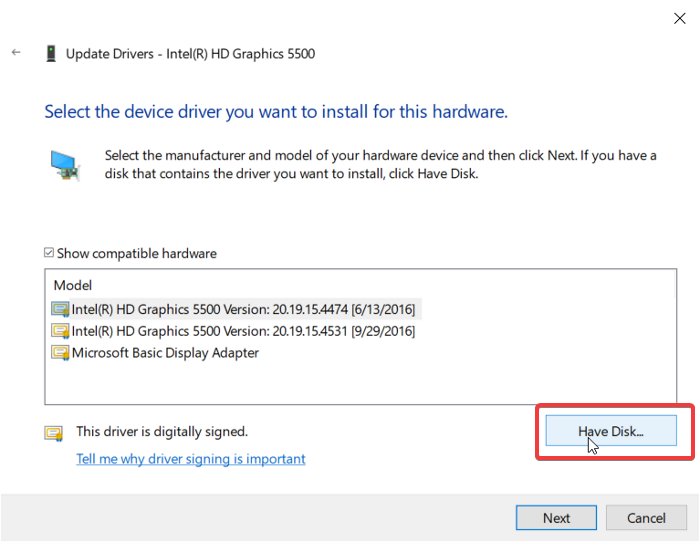
On the next screen, ensure that you don’t click the Browse button. Instead, choose the Let me pick from a list of available drivers on my computer option. Hit Next to continue. Next, click on the Have Disk button below the list and browse to the directory in which you extracted the zip file you downloaded. Go to the Graphics folder and double-click on the .INF file in this directory.
The file is named igdlh64.inf but it could be named anything. Just look for the .inf file. This is for 64-bit machines. Select igdlh32.inf if you use a 32-bit Windows PC. This is the reason why we set File Explorer to show extensions earlier. Hit Open after selecting the file, and the Intel driver will now show in the list. Click the Next button to continue. Allow Windows to take it over from here and install the driver. On successful installation of the Intel graphics driver, you’ll see a screen saying it. Click on the Close button to exit the installation. Finally, restart your computer so that the driver is completely installed. After installing the driver this time, you’ll never get the “driver being installed is not validated” error message again when you try to install Intel drivers. You can simply double-click on the .exe file to install driver software subsequently. If this does not help, you might want to use the Troubleshooting Wizard for Intel Graphics Drivers by visiting this page.